How to Set Up TalkTG: Website Live Chat in Telegram, Step by Step
A screenshot-by-screenshot guide: create a site, connect your Telegram bot, paste one line of code, and answer your first visitor from Telegram.
This guide walks through the whole TalkTG setup, from creating an account to replying to your first visitor from Telegram. It takes about five minutes, and every step has a screenshot so you know exactly what to expect.
What you need
- A website where you can add a script tag (any HTML site, WordPress, Shopify, Webflow, Next.js and so on).
- A Telegram account on your phone or desktop.
- About five minutes.
Step 1: Create your TalkTG account
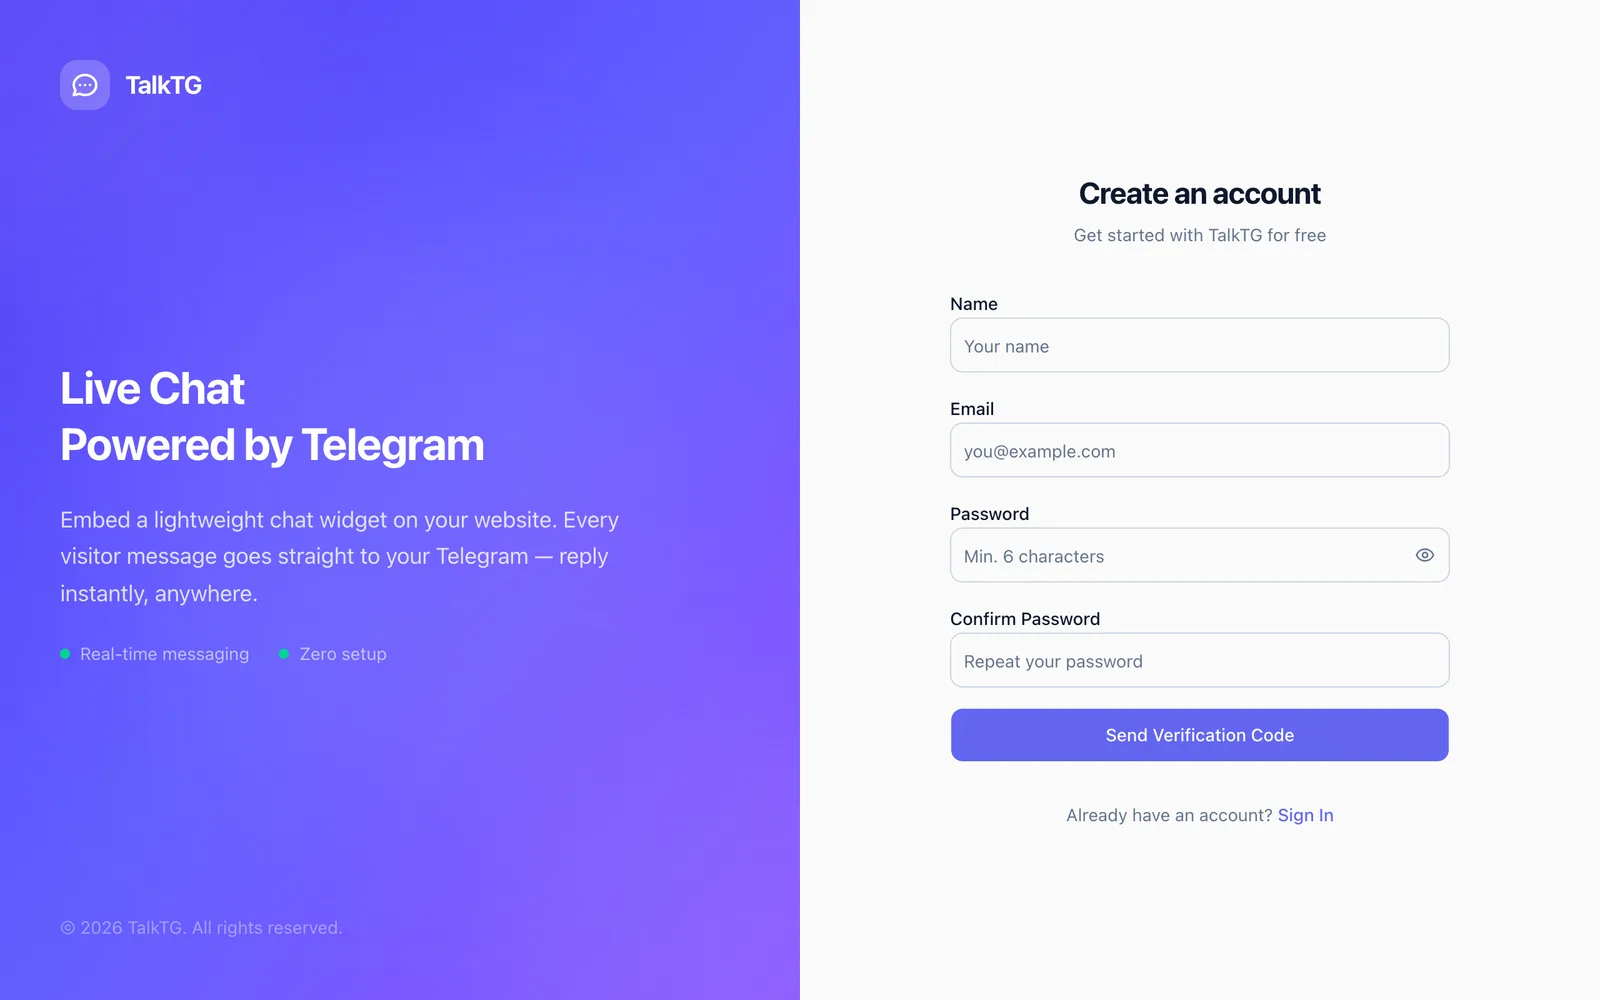
Go to talktg.com and click “Start for Free”. Sign up with Google, or enter your name, email and a password. We email you a 6-digit code to confirm the address. The free plan needs no credit card.
Step 2: Add your website
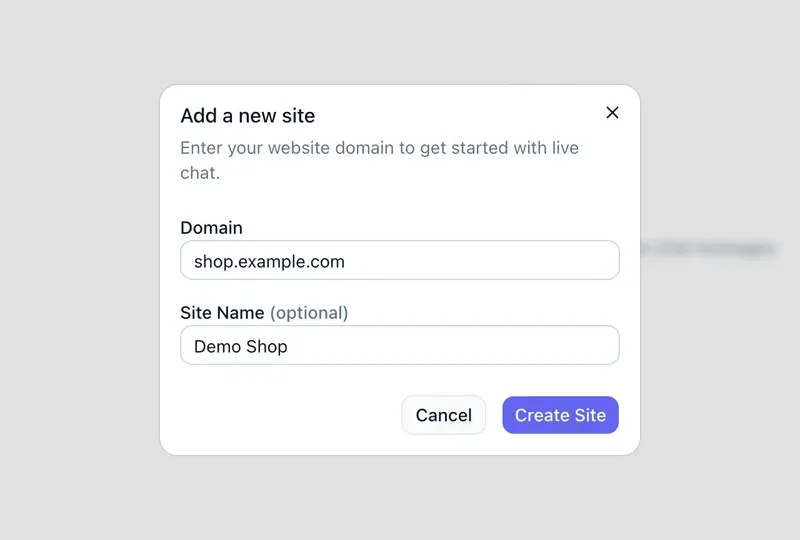
In the dashboard, open “Sites” and click “Add Site”. Enter your domain without https:// (for example shop.example.com) and, optionally, a name you’ll recognise. The widget only works on the domain you enter here, which stops other sites from reusing your widget.
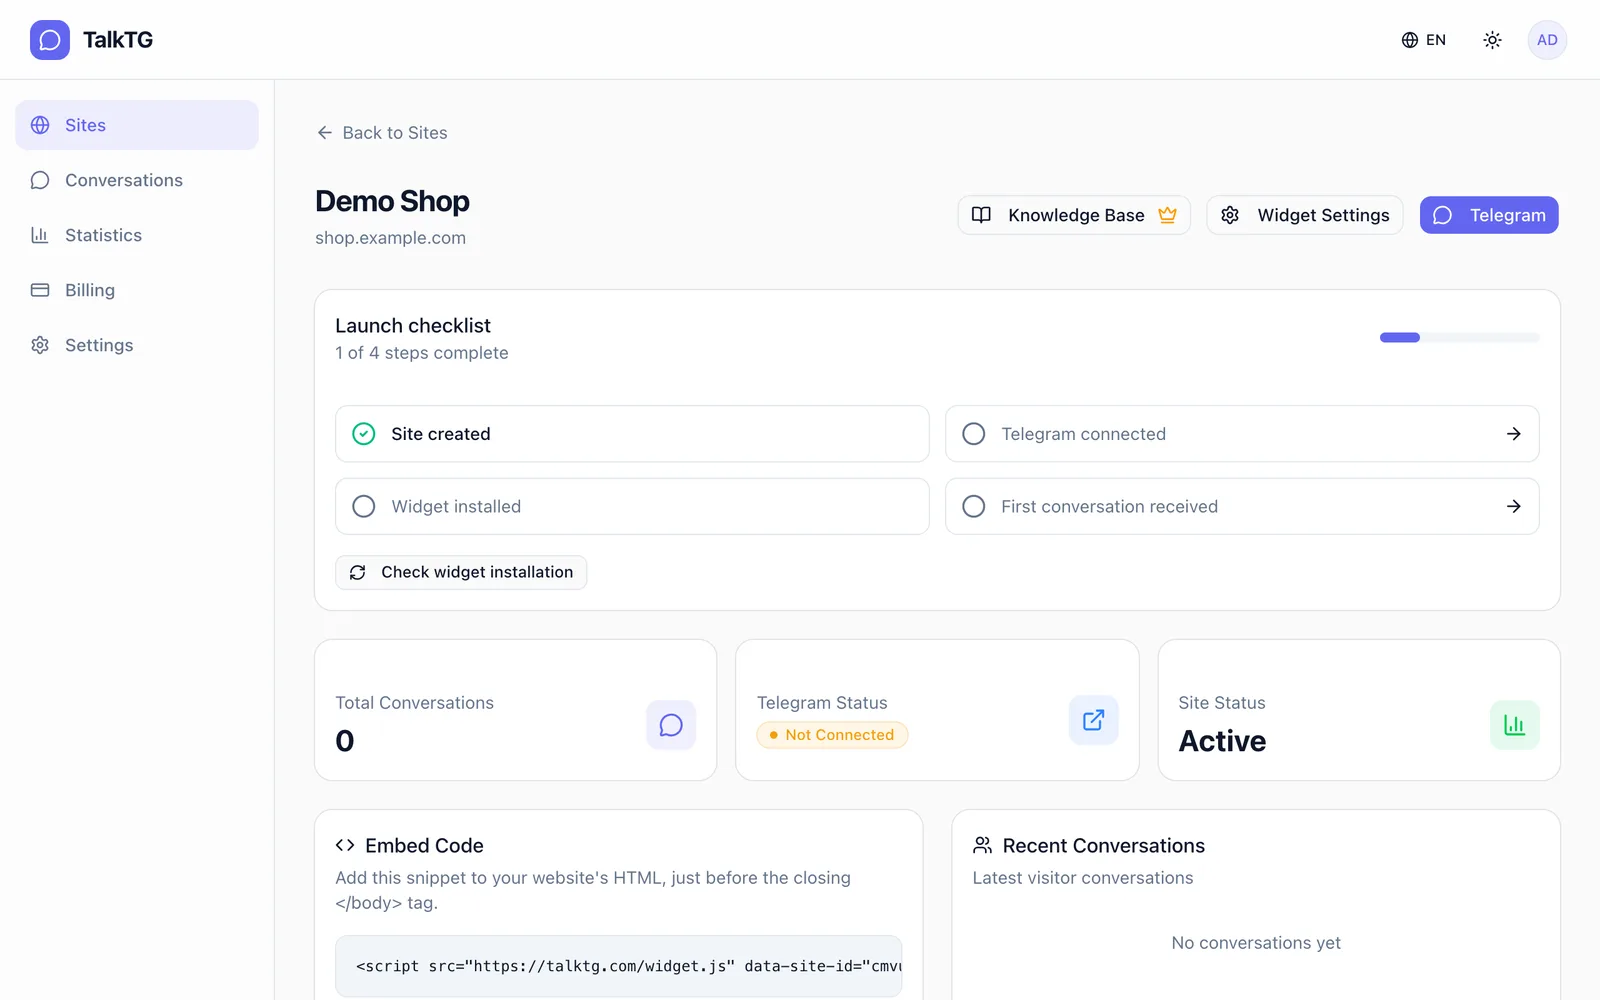
After creating the site you land on its overview page. The launch checklist at the top tracks the remaining steps: connect Telegram, install the widget, and receive your first conversation.
Step 3: Create a Telegram bot with BotFather
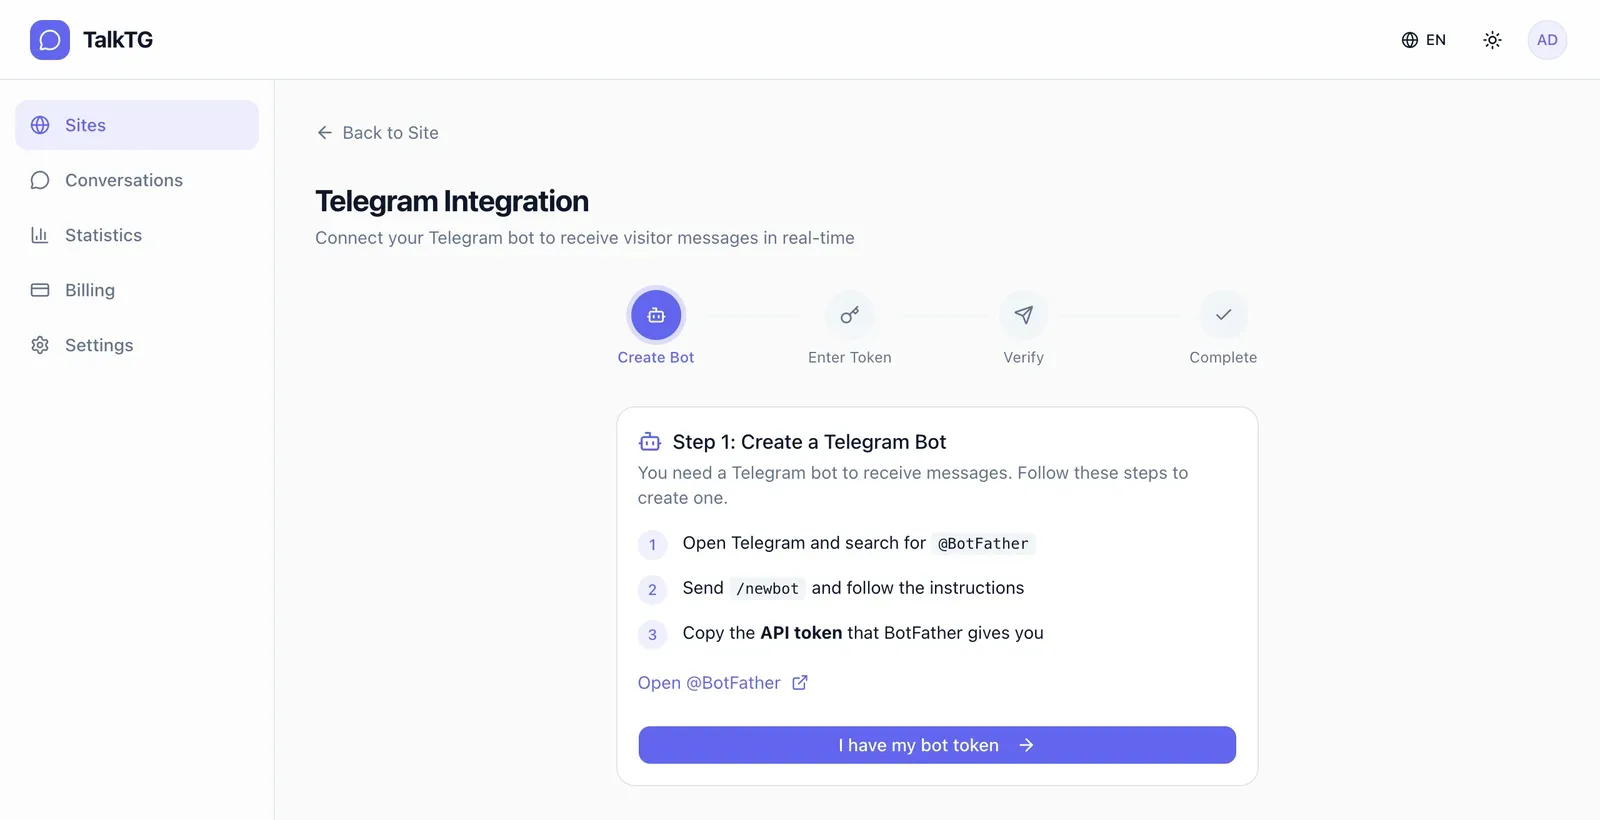
TalkTG delivers visitor messages through your own Telegram bot, so visitors see your brand and the bot belongs to you. Click the “Telegram” button on the site page to open the connection wizard, then create a bot:
- In Telegram, search for @BotFather (the official one has a blue check mark) and press Start.
- Send /newbot.
- Choose a display name, for example “Demo Shop Support”.
- Choose a username that ends in “bot”, for example DemoShopSupportBot.
- BotFather replies with an API token that looks like 1234567890:AAE… Copy it.
Treat the bot token like a password. Anyone who has it can control your bot. TalkTG stores it encrypted; if it ever leaks, send /revoke to BotFather and connect the new token.
Step 4: Connect the bot to your site
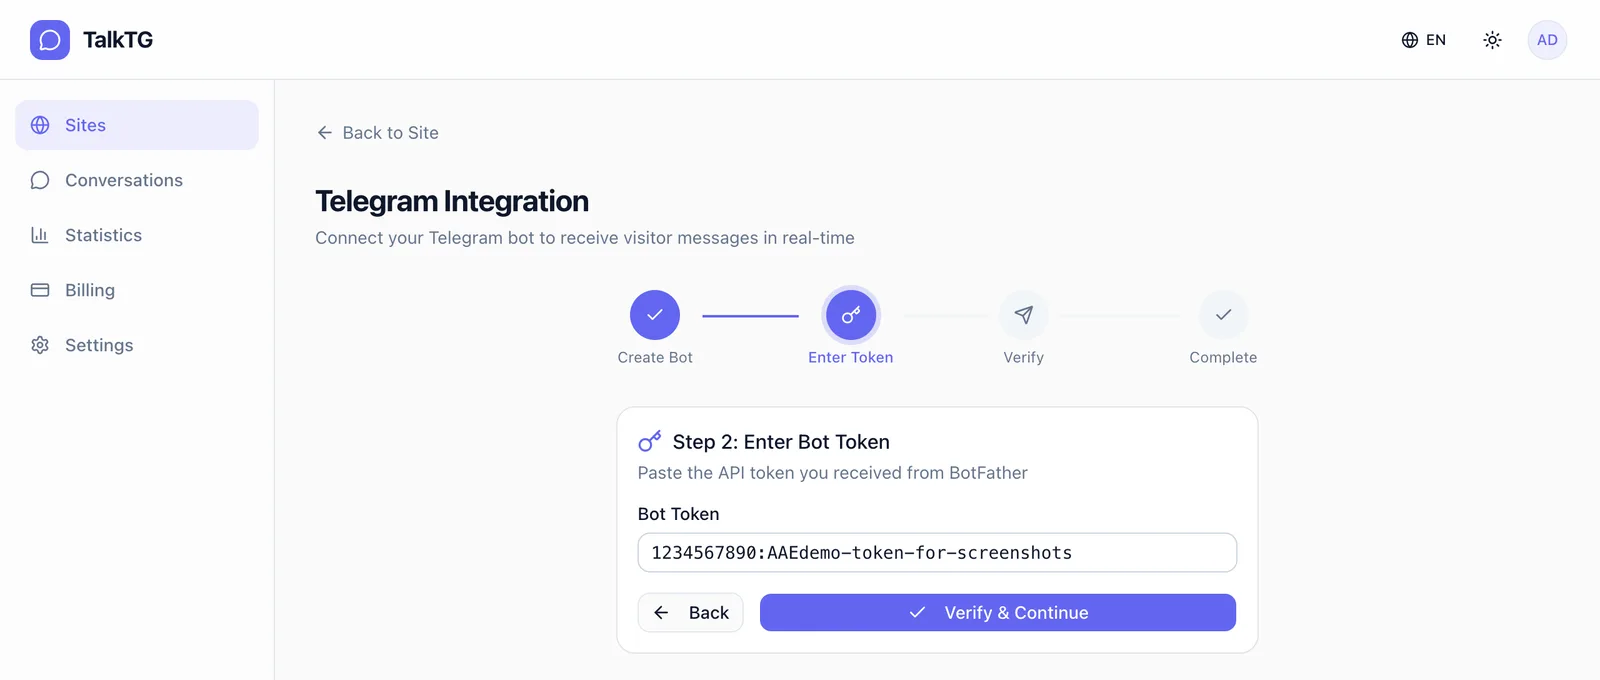
Click “I have my bot token”, paste the token, and click “Verify & Continue”. TalkTG checks the token with Telegram and links the bot to this site.
Next, TalkTG shows a 6-digit verification code. Open your bot in Telegram and send it the code (or /bindsite followed by the code). This proves the Telegram account that receives visitor messages is yours. The code expires after 5 minutes.
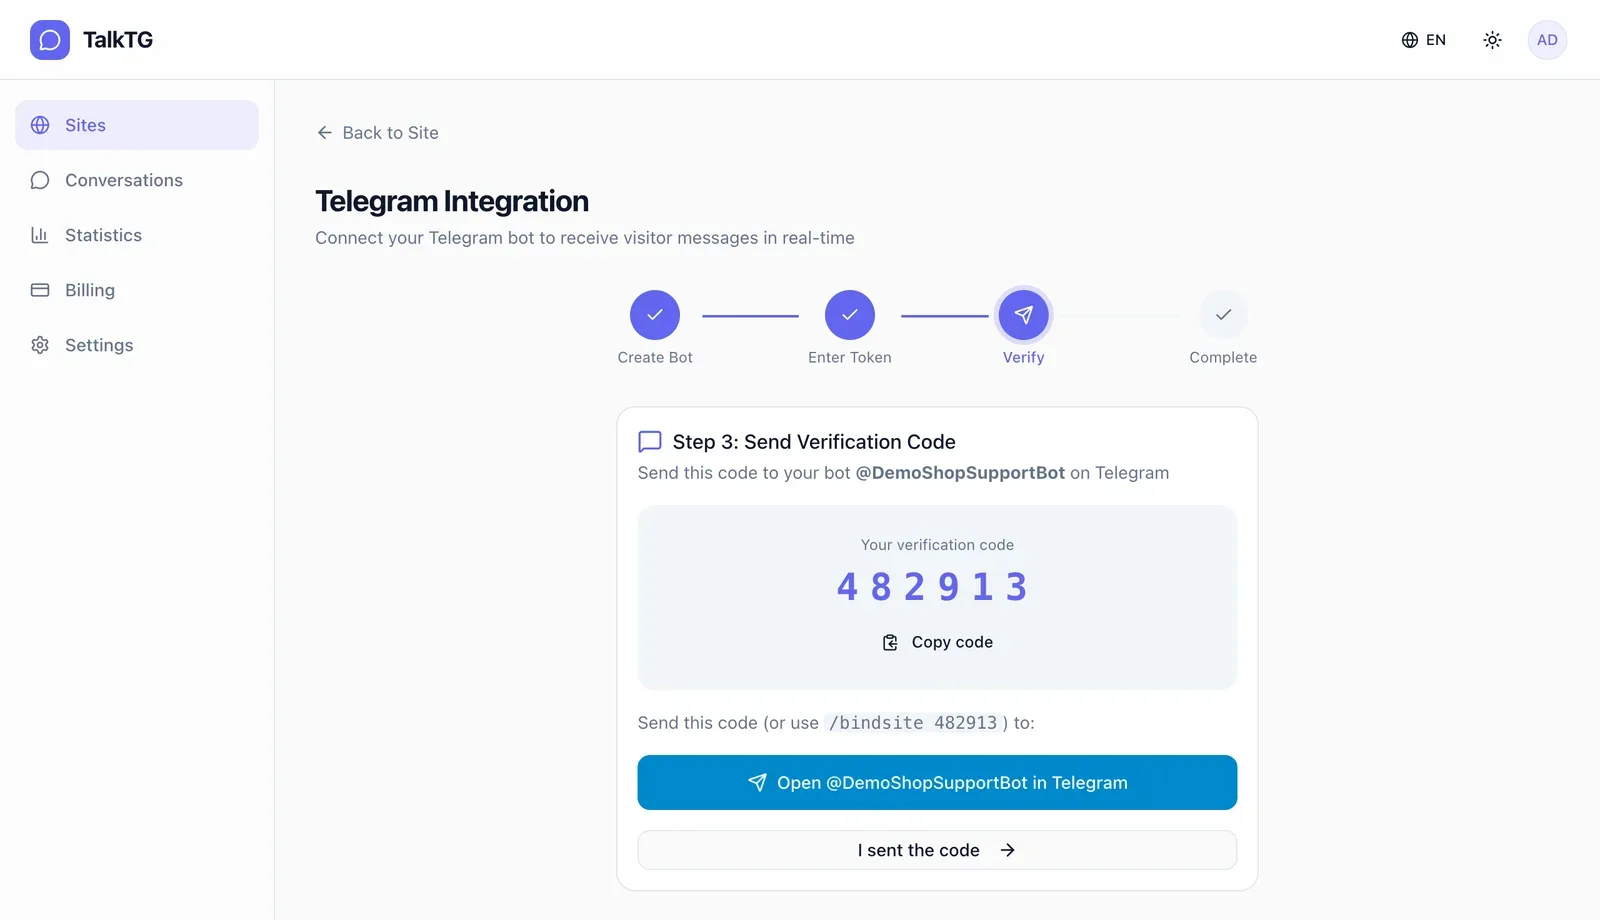
Click “I sent the code”. The page updates on its own as soon as the bot receives it and shows “Telegram Connected”, together with the bot commands you can use in Telegram.
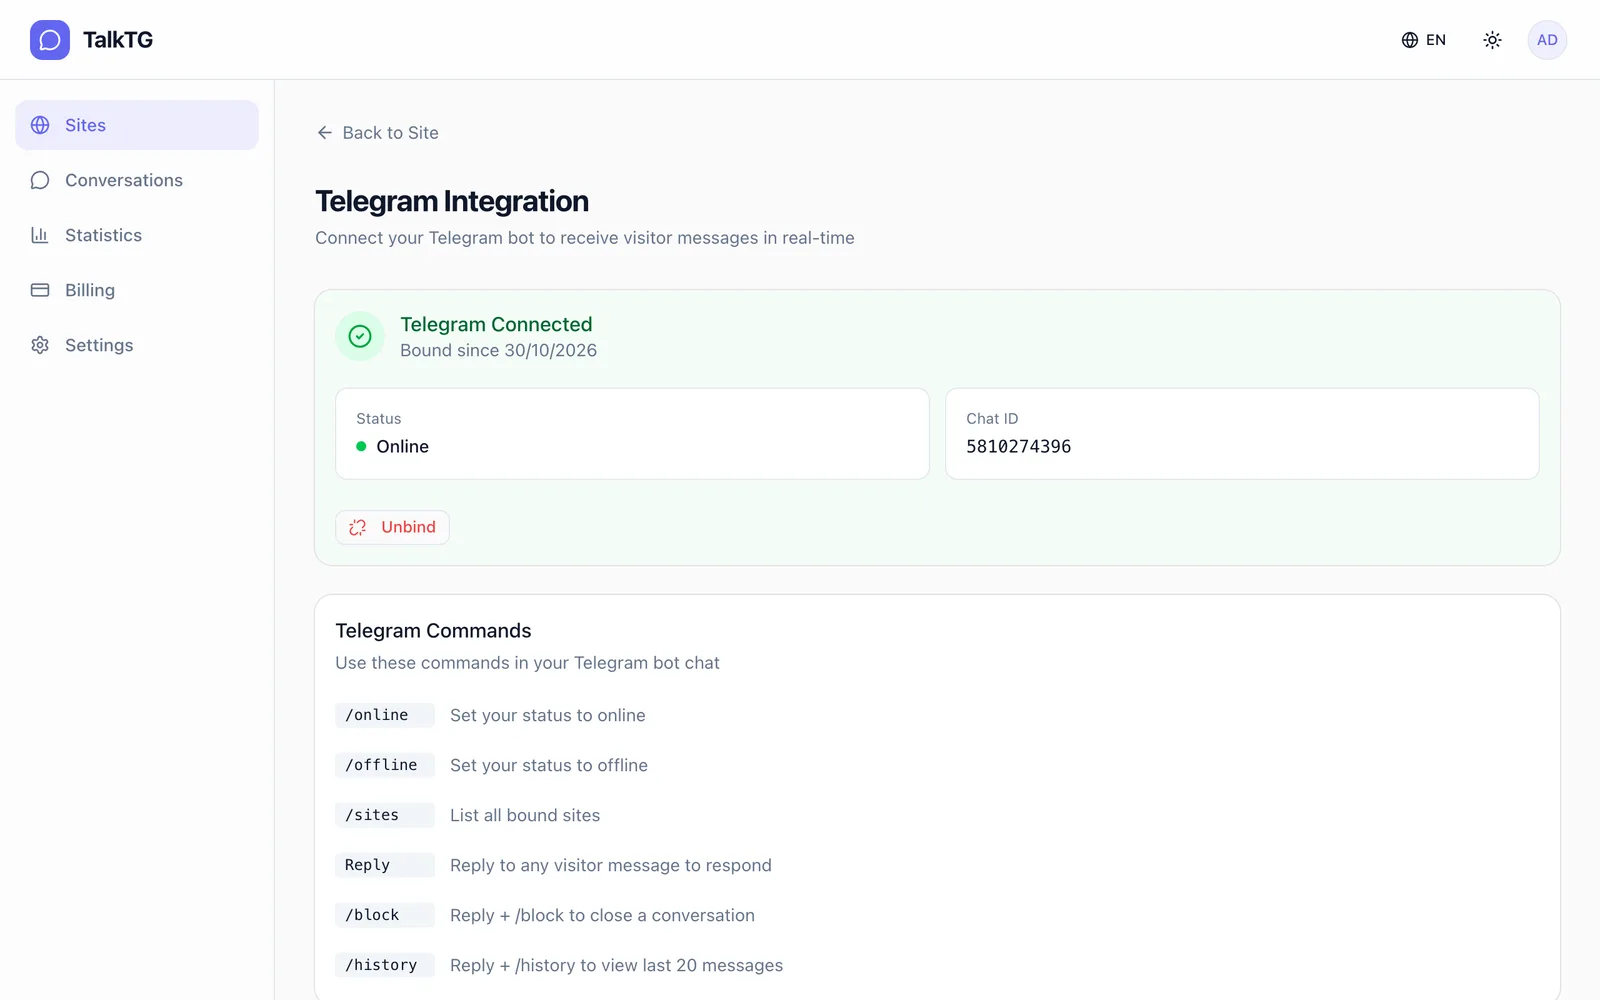
- /online and /offline: set whether the widget shows you as available.
- /sites: list every site linked to this bot.
- Reply: reply to a visitor’s message in Telegram to answer them.
- Reply + /block: close that conversation. Reply + /history: show its last 20 messages.
Step 5: Install the widget on your website
Go back to the site page and copy the snippet from the “Embed Code” card. Paste it into your site’s HTML just before the closing </body> tag. It already includes your site ID.
<script src="https://talktg.com/widget.js" data-site-id="YOUR_SITE_ID" async></script>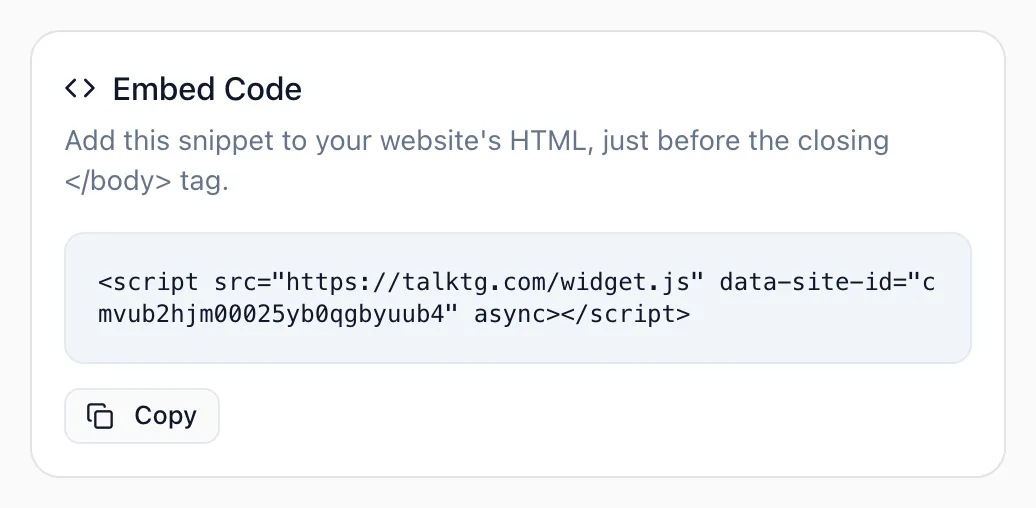
- Plain HTML: paste it before </body> on every page, or in your shared layout or footer template.
- WordPress: use your theme’s footer or a “header and footer scripts” plugin.
- Shopify: Online Store → Themes → Edit code → theme.liquid, just before </body>.
- React, Next.js and other SPAs: add it once in the root HTML template or layout so it loads on every route.
The script loads asynchronously and won’t slow your pages down. Back in the launch checklist, click “Check widget installation” to confirm TalkTG can find it on your site.
Step 6: Make the widget match your brand (optional)
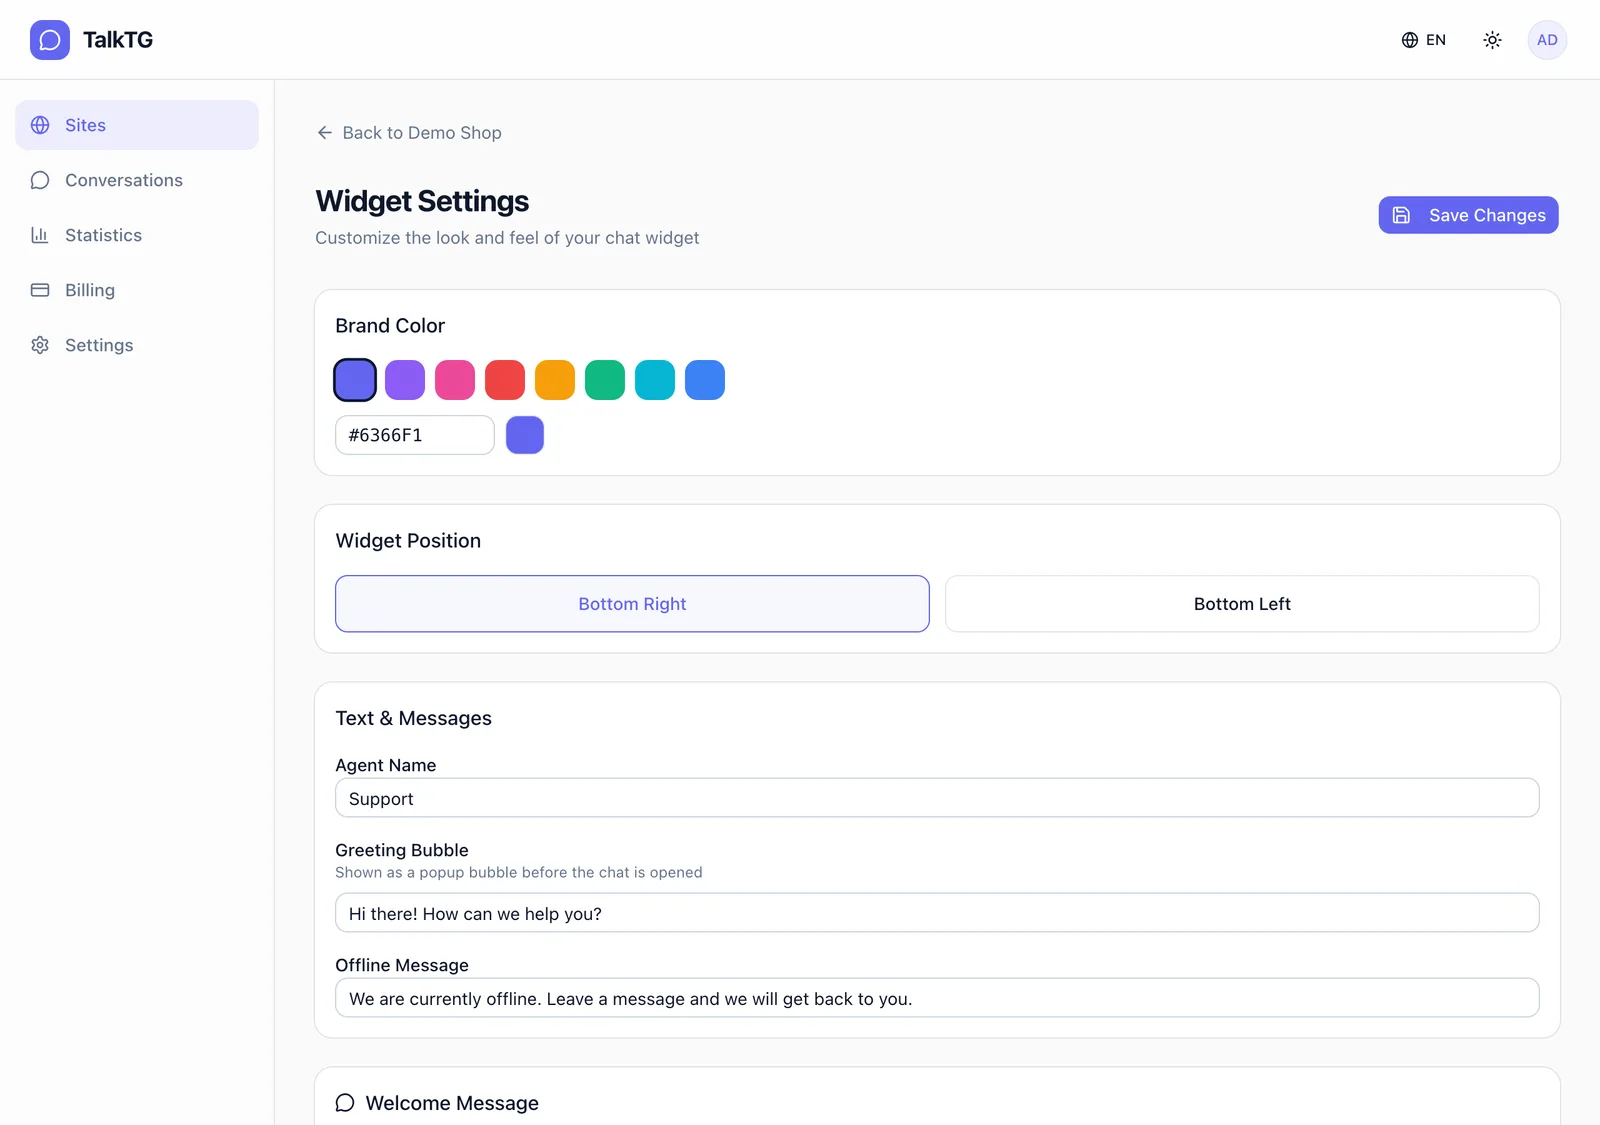
Open “Widget Settings” to pick a brand colour, choose the bottom-right or bottom-left corner, and set the agent name, greeting bubble, offline message and welcome message. You can also ask visitors for their email so you can follow up if they leave. Click “Save Changes” and the live widget updates right away.
Step 7: Send a test message
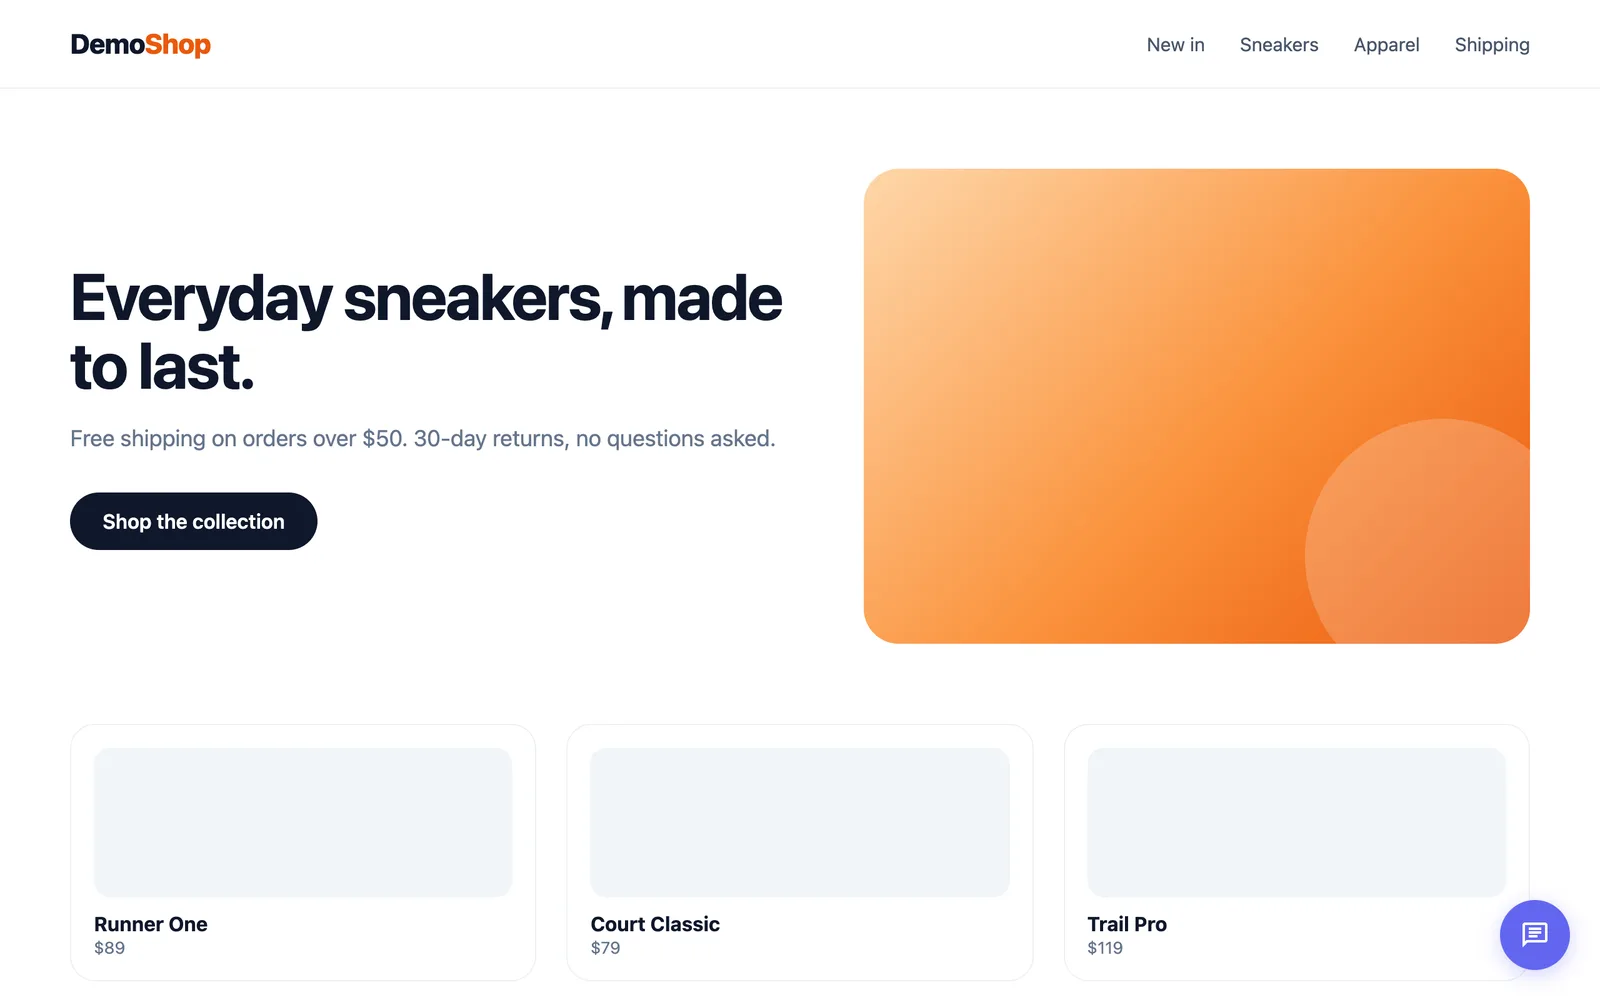
Open your website in a private browser window. The chat button appears in the corner you picked.
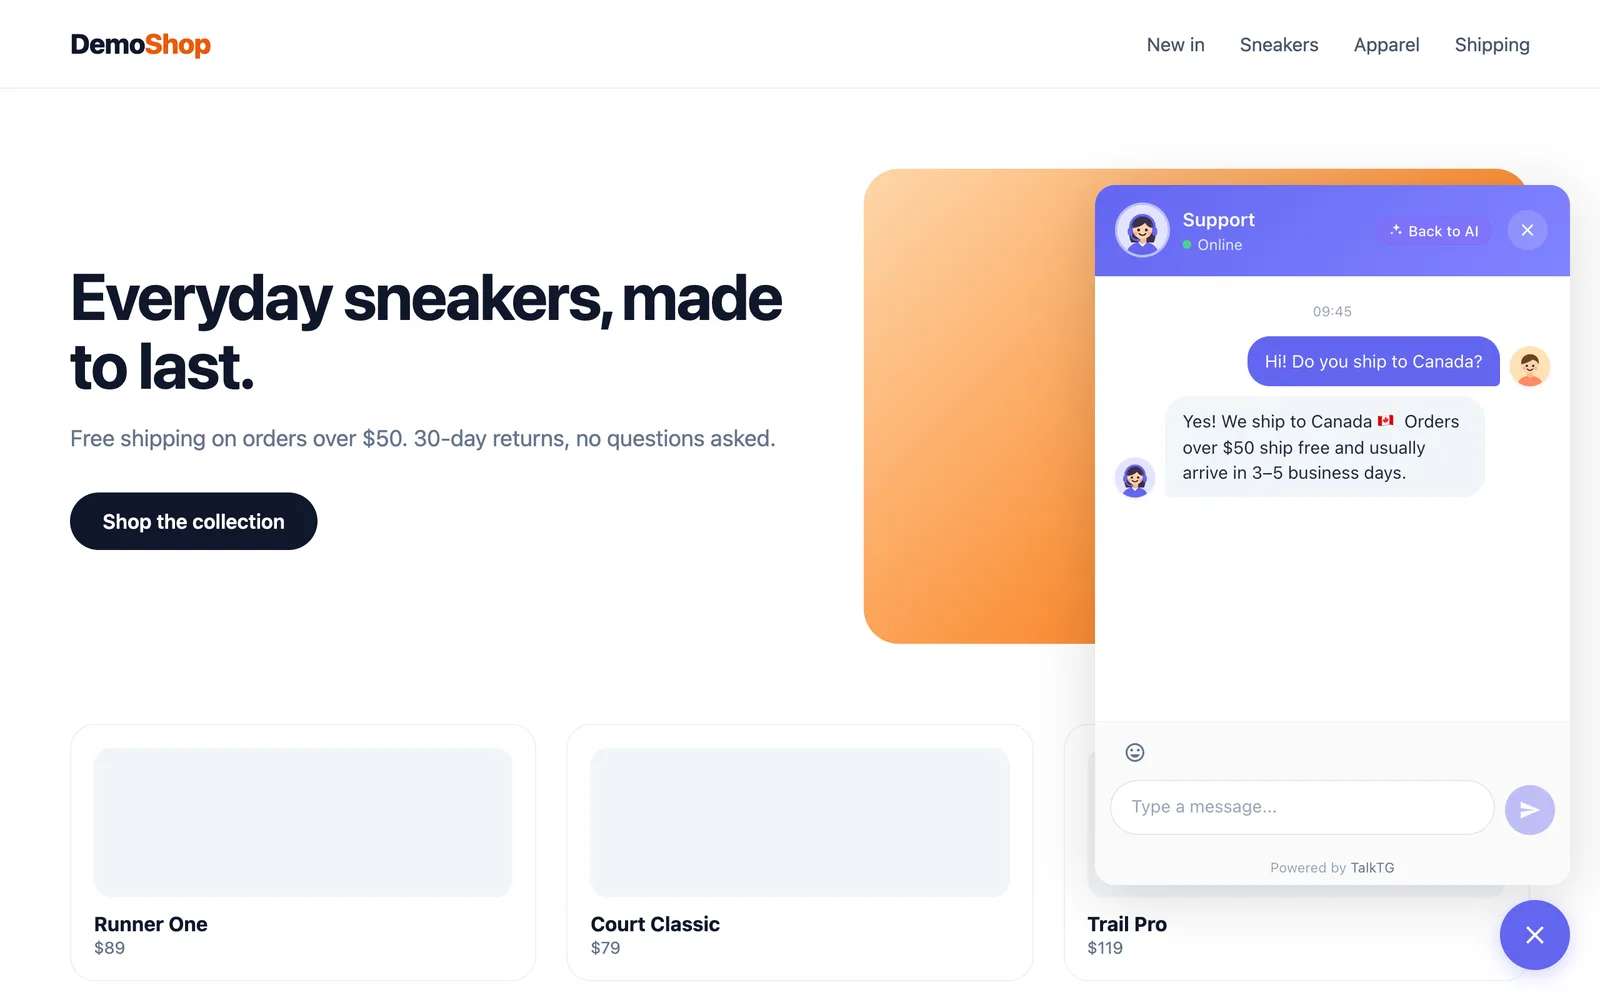
Send a message as a visitor. It arrives in your bot’s chat in Telegram within a second, along with the page it was sent from. Reply to that message in Telegram (swipe left on mobile, or right-click → Reply on desktop) and your answer appears in the visitor’s chat window straight away. No page refresh needed.
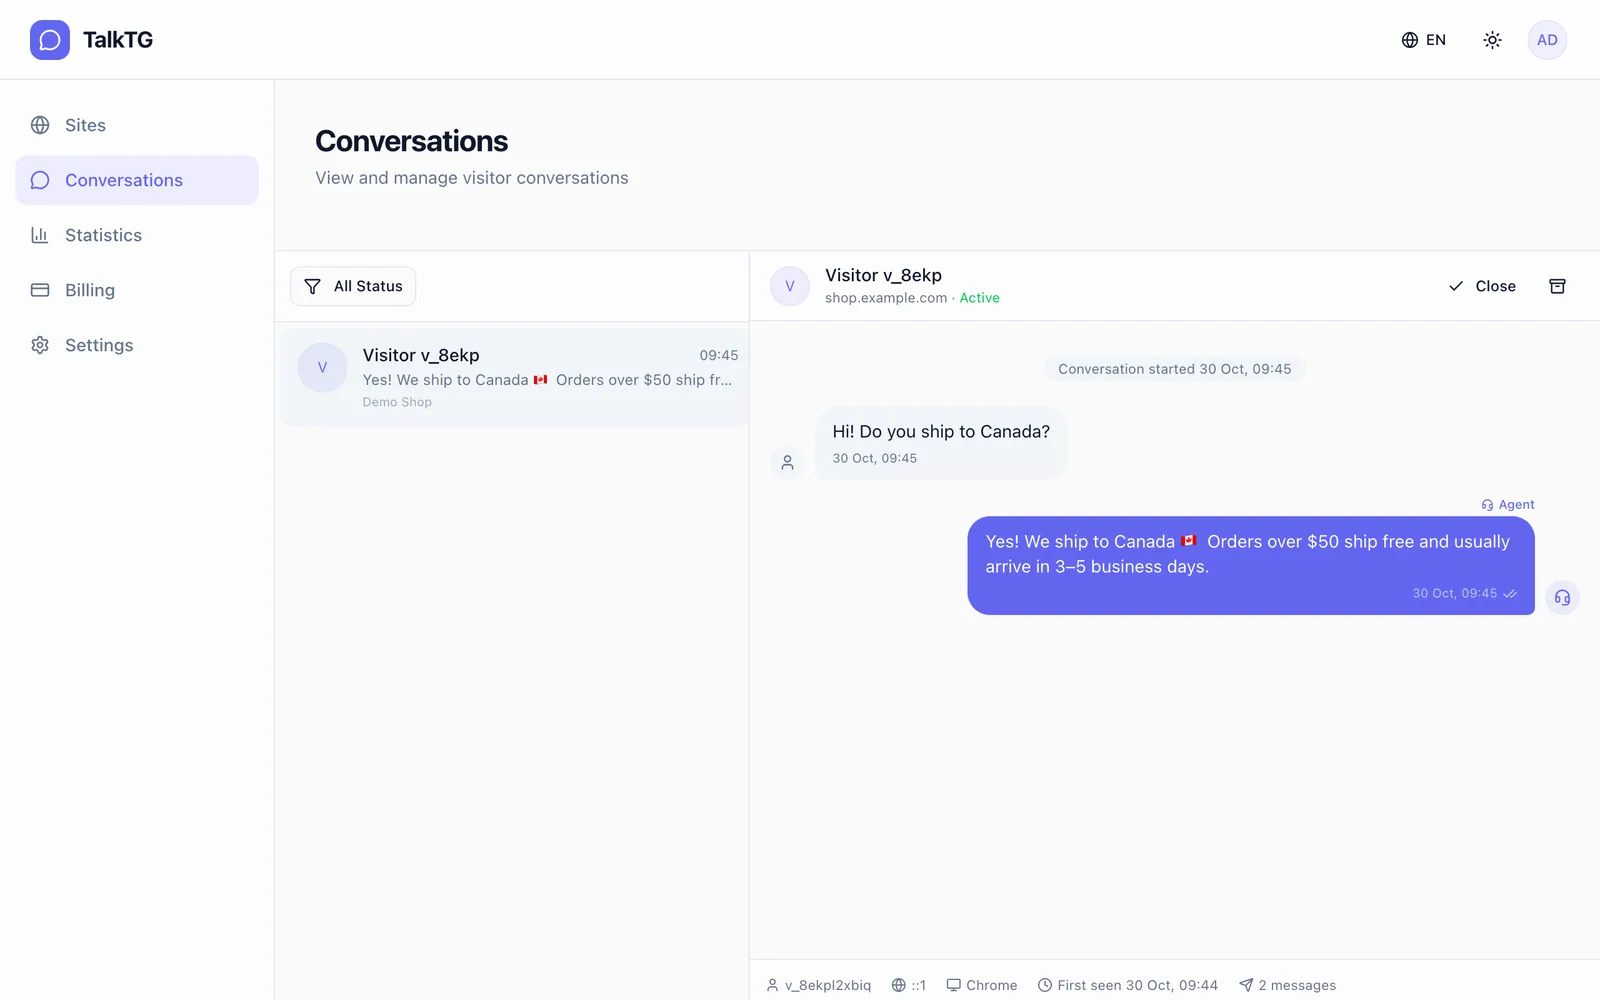
Every conversation is also saved in the dashboard under “Conversations”, with the full message history and visitor details like the page, browser and first visit time.
Troubleshooting
- The chat button doesn’t appear: make sure the snippet is on the page you are viewing, and that the domain in TalkTG matches your site’s domain exactly.
- The bot token is rejected: copy it again from BotFather, including the part before the colon, with no spaces.
- The verification code didn’t work: codes expire after 5 minutes. Click “Go back & try again” to get a new one.
- Messages don’t reach Telegram: check that you haven’t blocked or stopped the bot, and that the site shows “Telegram Connected”.
What’s next
You’re live. Reply from Telegram wherever you are, and use /offline when you step away so visitors know to leave a message. To answer common questions automatically, even at night, add your docs and FAQs to the AI knowledge base (Pro plan). It replies for you and hands the conversation to you in Telegram when it can’t answer.